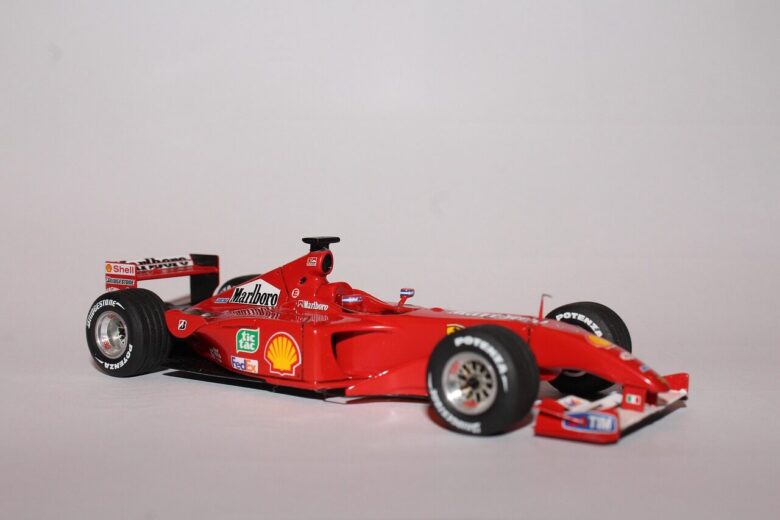
A complicated racing livery becomes much easier to paint when you stop seeing it as one graphic.
A sweep across a fender may be one boundary. A contrasting roof may be another. Sponsor panels, number backgrounds and pinstripes may belong to completely different layers of the finish.
The masking itself is only part of the job. The more important skill is deciding which boundaries should be painted first, which can be created with tape, which are better handled by decals and how each new color affects the work already underneath it.
A clean mask applied in the wrong sequence can still create unnecessary paint buildup, difficult remasking and visible edges.
Break the Livery Into Four Types of Information
This prevents a common mistake: trying to paint every visible element simply because it appears in the reference photo.
A painted red door panel may make sense. Recreating a tiny sponsor logo with masking tape usually does not.
Create a Paint-Order Board
Before painting, write down the sequence you expect to follow.
Painting lighter colors before darker colors can reduce coverage problems in many ordinary schemes, but it should not be treated as an absolute rule.
Fluorescent paints may depend heavily on a particular undercoat. Metallics can behave differently over different bases. Candy finishes are intentionally translucent. Some graphics are easier to mask positively, while others are much easier to mask in reverse.
The correct sequence is the one that respects the paint system while minimizing unnecessary masking over delicate finished layers.
Use the Narrowest Tape for the Critical Edge
The first strip of tape defines the paint line. Large pieces added afterward mainly protect the surrounding body.
Tamiya currently sells dedicated model masking tape in widths as small as 1 mm and 2 mm. Its 1 mm and 2 mm tapes are only 0.08 mm thick and are specifically described as flexible enough for small or curved model surfaces.
That makes narrow tape useful for laying out a sweeping stripe around a wheel arch or across a compound body curve.
Once the critical edge is established, wider tape, masking sheets or protective film can cover the remaining area.
There is little benefit in covering an entire 1/24 body with expensive 1 mm tape. Use it to create the edge, then expand the protected area with wider material.
Do Not Force Ordinary Tape Around an Impossible Curve
When conventional paper tape begins wrinkling, lifting or forming small triangular folds, the problem may be the geometry rather than your technique.
Tamiya’s current masking range includes narrow model tape, dedicated tape for curves, masking sheets and liquid masking material. These products exist because different shapes require different ways of creating a boundary.
For a long smooth curve, flexible curve tape can be more appropriate than repeatedly cutting and overlapping short pieces of ordinary masking tape.
For irregular recesses where tape is difficult to place, masking fluid may be useful.
Masking Fluid Is Useful, but Not Everywhere
Tamiya’s current masking-fluid instructions say it can be used on complex and curved shapes that are difficult to mask with tape.
The manufacturer also gives several important limitations: the base coat should be fully dry, the fluid should be applied in a thin layer, and care is required over water-based paints. Tamiya recommends a fresh modeling-knife blade when cutting the dried material.
Cutting through the mask also creates the possibility of cutting through the paint. Whenever possible, make complicated templates away from the model or use only enough blade pressure to cut the masking layer.
Burnish the Edge Without Crushing Detail
The tape needs intimate contact at the paint boundary, especially where it crosses panel lines, door gaps or molded features.
Use a clean rounded tool, cotton swab or suitable burnishing tool to press the edge gently into those transitions.
Do not apply unnecessary pressure across the entire mask. The goal is to seal the edge, not permanently bond the tape to the paint underneath.
Before spraying, inspect the edge under strong light. Tiny lifted areas around wheel arches and door seams are easier to correct now than after paint has passed underneath.
Control Paint Buildup at the Mask Line
A racing livery can require several colors, which means every painted boundary has the potential to become a visible ridge.
Heavy coats against the tape edge make that problem worse.
| Masking problem | Better approach |
|---|---|
| Heavy ridge along color boundary | Use controlled coats and avoid flooding paint against the tape edge. |
| Paint creeps underneath | Check edge contact, panel-line transitions and paint application before adding more material. |
| Previous color lifts | Allow proper cure, use appropriate model masking material and test adhesion on the actual paint system. |
| Curve becomes uneven | Replace a strained tape section rather than forcing it into position. |
| Multiple masks no longer align | Use fixed reference points on the body instead of estimating each graphic independently. |
Use Body Features as Registration Points
Complex racing graphics often need to match from one side of the vehicle to the other.
Instead of measuring only from the bottom of the body shell, use repeatable model features such as:
- door gaps;
- wheel-arch centers;
- window corners;
- fuel fillers;
- panel intersections;
- body creases.
Measure important graphic intersections relative to these fixed points and record them before masking the opposite side.
For symmetrical liveries, a paper or masking-sheet template can also help transfer the same curve from one side to the other.
Make Templates Before Working on the Painted Body
Complex geometric sections are often easier to design on low-risk material first.
Tamiya currently sells plain masking sticker sheets as well as grid-backed masking sheets, while Mr. Hobby’s current masking range includes pre-slit sheets and shaped masking material.
You can sketch a graphic on paper, refine its proportions, transfer it to masking sheet and test-fit it before the final mask touches the model.
This is especially useful for:
- number-panel backgrounds;
- large chevrons;
- repeating stripes;
- roof graphics;
- symmetrical side designs.
Remove the Mask Deliberately
Do not rip every piece of tape from the body immediately after spraying.
The correct removal timing depends on the paint system, so follow the paint manufacturer’s instructions where available. More important is the removal technique.
Peel tape slowly and keep the pull angle low rather than lifting sharply away from the body. Watch the paint boundary as the tape releases.
If a section appears to be pulling the underlying finish, stop and assess it instead of continuing around the entire model.
Surface contamination, insufficient curing, incompatible layers or poor primer adhesion can all make a finish vulnerable to masking.
Use Decals Where Painting Stops Adding Value
A strong racing-car finish usually combines techniques rather than forcing everything into one method.
Large color divisions often benefit from paint because they look integrated with the body finish. Fine logos, lettering, driver names and extremely complex sponsor graphics are commonly better suited to decals.
The objective is not to prove that every element was airbrushed. It is to produce a clean and convincing scale representation.
A Reliable Sequence for Multi-Color Liveries
Before spraying the next livery color
- Confirm the underlying paint is adequately cured.
- Check that both sides of the design use the same registration points.
- Inspect every tape edge under directional light.
- Make sure panel lines have not lifted the tape.
- Cover the rest of the body against overspray.
- Confirm the new color is compatible with the existing paint system.
- Test unfamiliar paint and masking combinations on a spare surface first.
Define the critical paint boundary with the right masking material, plan the color order before spraying, use repeatable registration points and leave extremely fine graphics to decals when that produces a cleaner scale result.
Official technical references
The masking-material and application guidance in this article was checked against current model-manufacturer documentation.
The LS Resin Lab Editorial Team manages and reviews the site’s educational content on resin modelmaking, SLA printing, painting, finishing, workshop safety, and related workflows. Articles are maintained for clarity, accuracy, and practical usefulness. Readers can report corrections or contact the editorial team through the Contact page on LS Resin Lab.